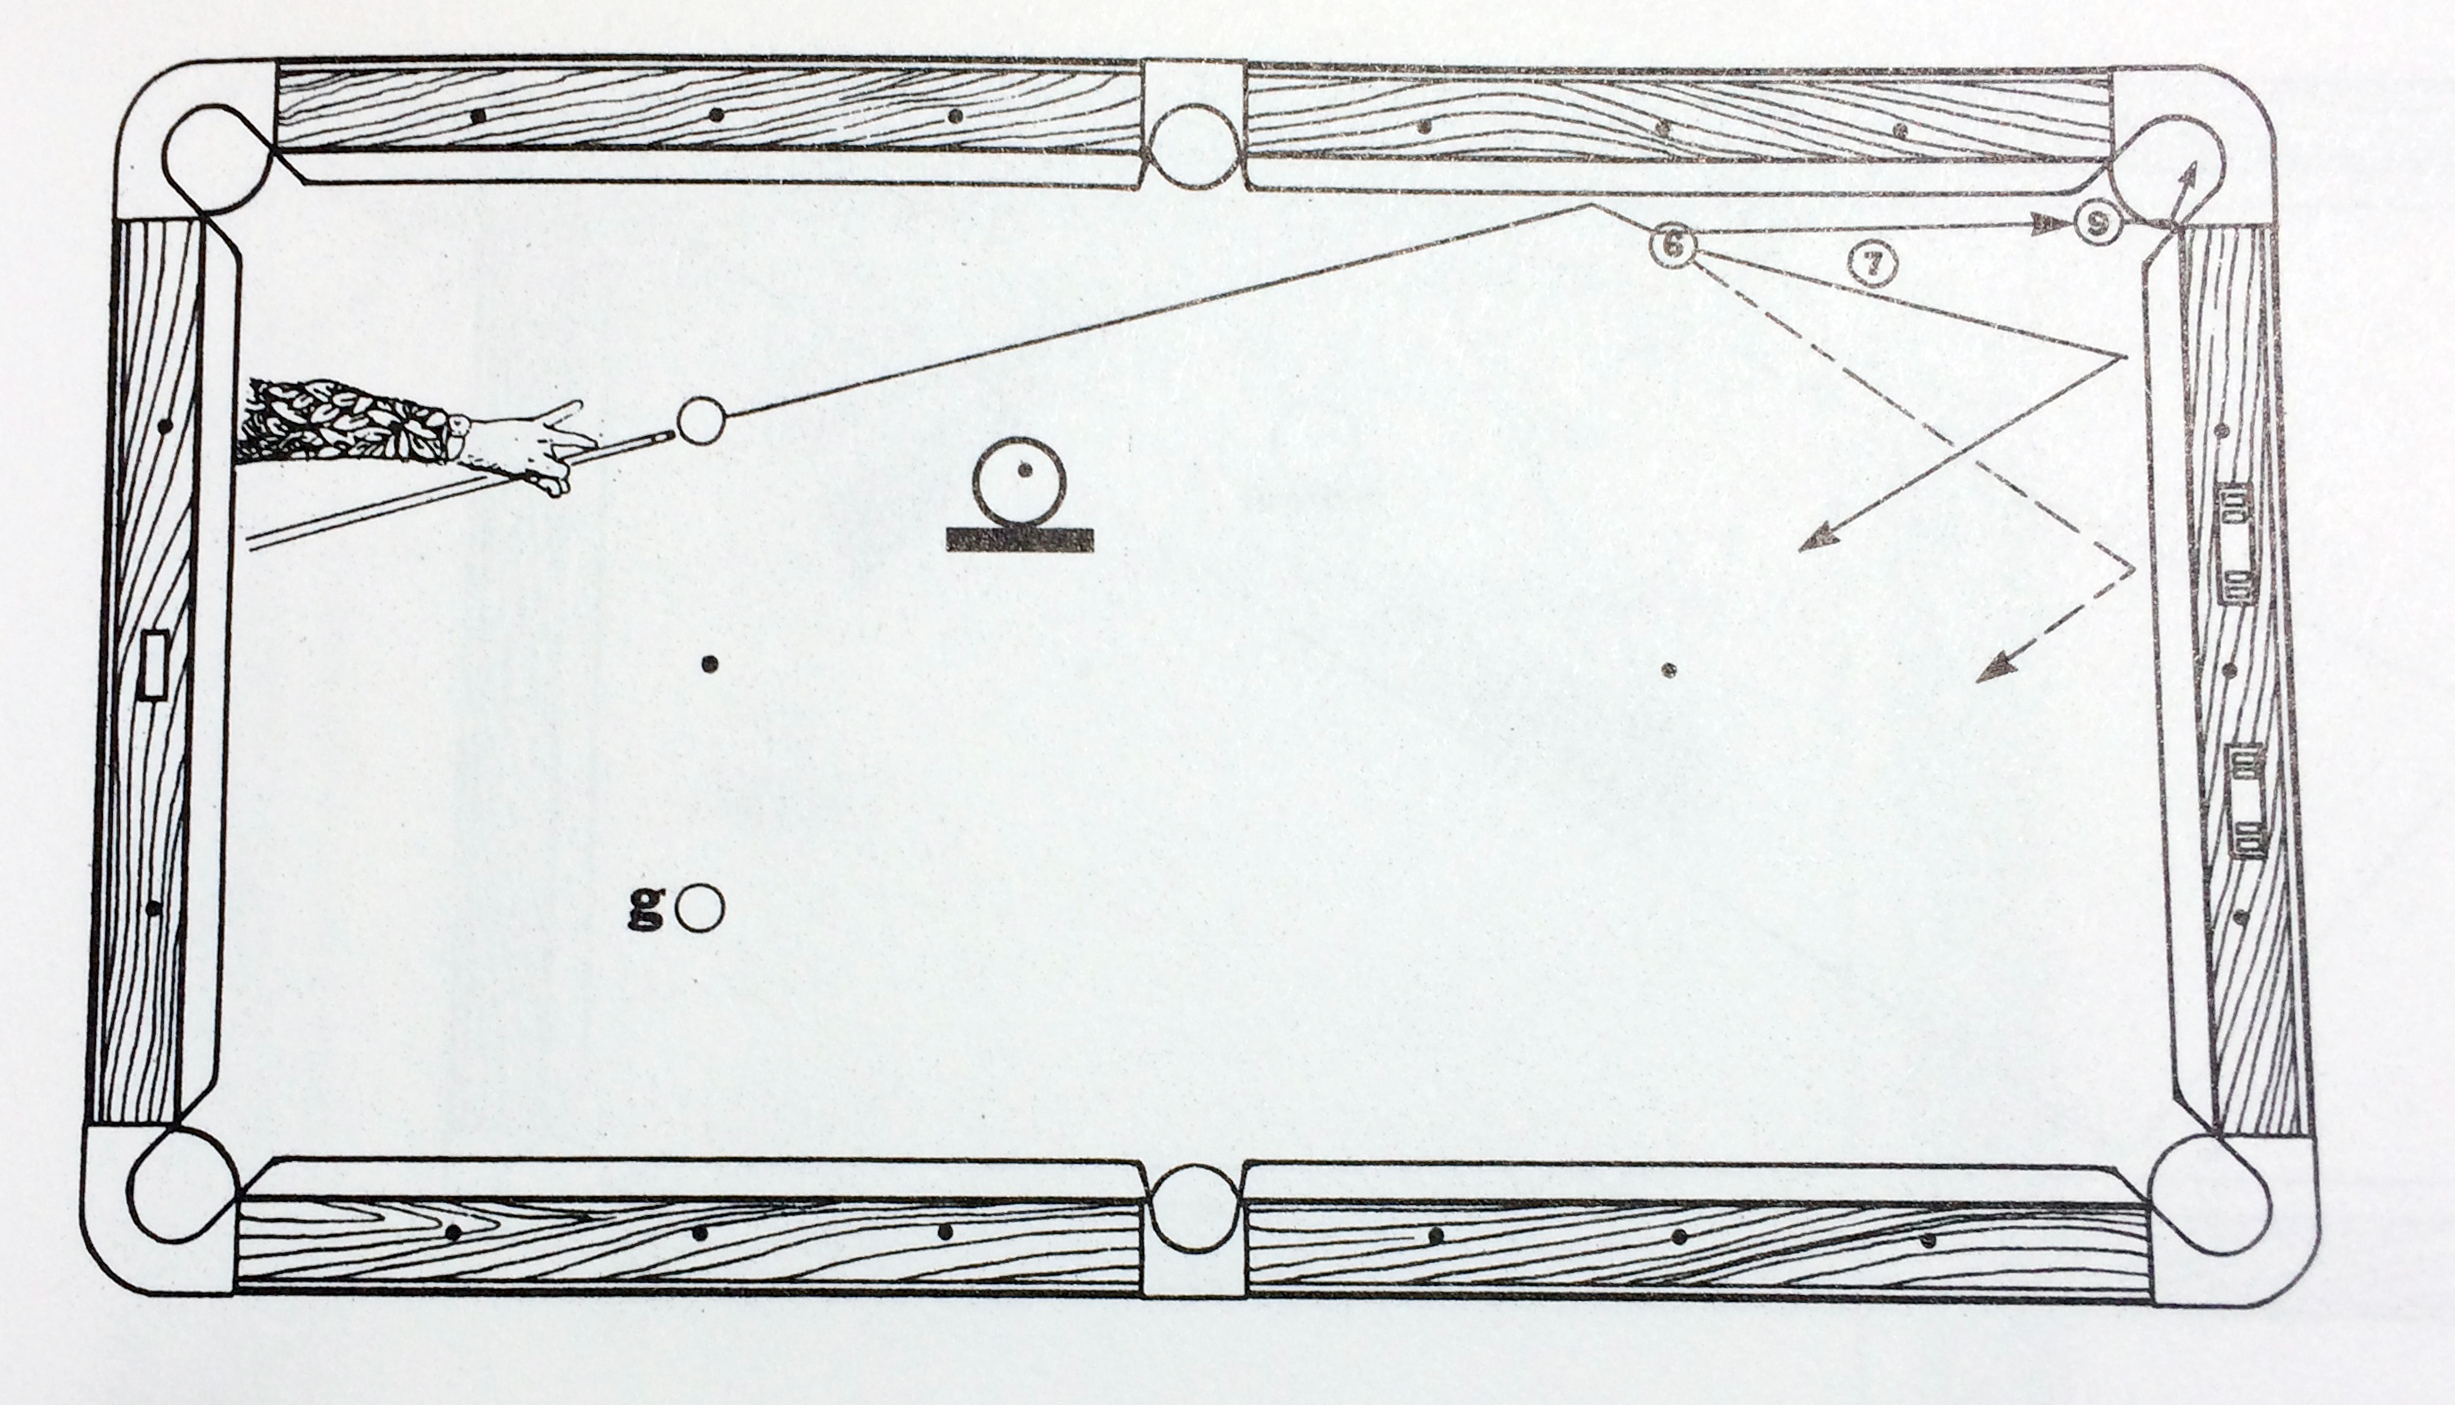
Drop Anchor by Tom Simpson
In a previous column, I talked about the idea of the grip hand feeling soft. I called it “cloud hands”. I suggested that, as you approach the shot, both hands should have this cottony, extremely soft character. The goal is to maintain that softness in the grip hand all the way through to the completion of the shot, preventing micro-movements in the hand that could cause a miss.
Both hands are soft during the approach to the shot. However, once your bridge is on the table and is set where you want it, I think it makes good sense to anchor the bridge to the table. Make it a rock.
After all, what is the purpose of the bridge? The purpose of the bridge is to provide an absolute rock that helps guide the tip to the precise spot at which you want to strike the cueball. A soft, relaxed bridge might get the job done alright, but is it really stable and secure? If it’s soft, it might remain motionless, but it’s very easy to make little adjustments and micro-moves when the hand is soft. You probably don’t realize you’re doing it.
Many players, in video analysis, see that they make unconscious “corrections” in their swing, swerving, dipping, or twisting their grip hand during the swing. Some players have this same problem in their bridge – unconscious adjustment. It’s a smaller move, but it can be a big problem. If we can avoid unconscious bridge “correction” during the swing, we’ve eliminated another source of inconsistency and error. Anchoring the bridge helps primarily with reducing errors and inconsistencies arising from a weak, uncommitted bridge. And if you are one of those players who “jump up”, anchoring sometimes helps overcome that tendency.

As your bridge becomes stronger, more alive, more stable, you’ll be able to devote more of your attention to your aim and stroke. Your bridge will instill fear in others.
What are we talking about? As your bridge comes to rest exactly where you want it, in the powerful, stable shape you want, with the tip at the height and distance you want, your bridge hand firms up. You want to nail your hand to the table, so you can forget about it and leave it alone. If you’re using an open hand bridge, nail it to the cloth by pressing with the tip of your forefinger. Some elevated bridges will anchor both the forefinger and the little finger. When using a closed (loop) bridge, try anchoring with the middle finger. Notice the “white knuckles” in the forefinger in the anchored bridge below, indicating pressure.
Once your bridge is anchored into the cloth, it’s not going anywhere. Through this process, you have firmed your commitment to the shot and your readiness to shoot it. The process of locking your bridge hand down builds your confidence. The more confident and ready you are, the less likely you are to second guess and steer or move your bridge hand during the hit stroke. Bridge like you are absolutely on top of your game. Convince yourself and your opponent.
How do you know when your bridge hand is where it needs to be? Whatever your pre-shot routine, at some point you are as ready as you’re going to be. At that point, bring your tip to a full stop at the back of the cueball. Is your bridge where it needs to be, stable in a shape that supports your tip height, at a distance that’s good for you? If so, and the shot looks right, gradually anchor your bridge. I’d say you should be anchoring hard enough that you know you’re doing it, but not so hard that you’re using most of your strength. Enough that you know it won’t move. Once you are satisfied with your anchored bridge, maintain that pressure, that forward focus, until the stroke is finished.
Drop anchor. Lock your bridge in place. Lock your mind on the target. Fire. Stay down and show off your rock-solid bridge.